
What is a clipping path?
Image clipping path is when a designer uses a path to outline the areas that should remain transparent, or are supposed to be transparent, around an image. This is usually done by drawing a black line around the edges of the image with a drawing app, like Pencil.
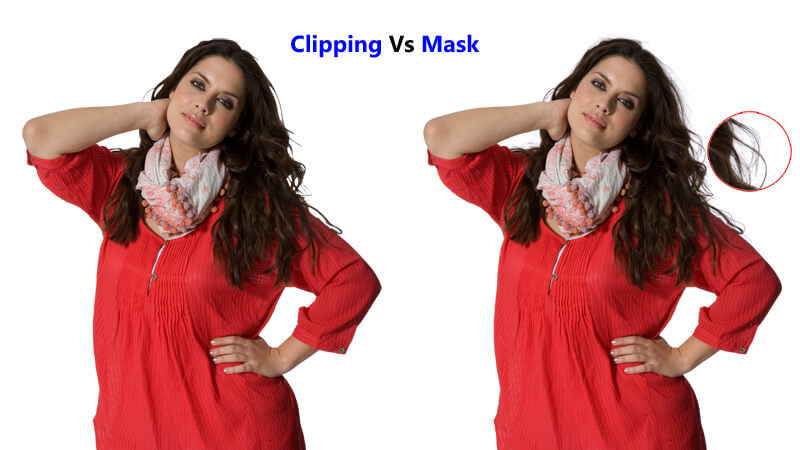
This technique is useful if you have a layout where the image needs to be completely visible, like a header, but you don’t want the rest of the page, like the title or body text, to be covered by the image. This method also has several other uses, like creating rounded corners or cutting a logo out of its white space. Image Clipping Path India explain Clipping path Vs Masking Below.
Image Clipping Path Vs Masking
What is image masking?
Image masking is when a designer draws a path or area to cover up the background of an image. This is usually done by drawing a white or black line around the edges of the image with a drawing app, like Pencil.
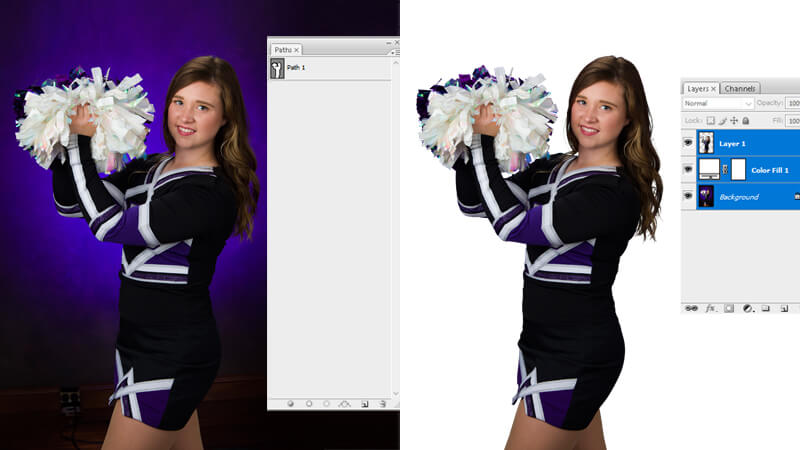
Image masking is usually used to cover up logos or other text on websites and blog posts but can also be used for other purposes, such as hiding the footer of a website or creating rounded corners.
Types of Photoshop Masks
Masking is the art of hiding parts of an image or video by painting over them. You can use Masking to protect sensitive information, obscure elements, or add artistic effects. Here are different types of Photoshop masking and how you can use them to achieve specific effects in your images.
Read More: Photoshop Image Masking and Its Benefits in Photo Editing
Layer Masking
Layer masking is perhaps the most basic of all masking techniques. With layer masking, you paint over a layer in Photoshop with the mask you want to use. How come? Photoshop makes a copy of the layer in which the mask is painted, and then it invisibly adds that painting to the original layer. Note that you are painting with a mask. All the areas you paint over with the mask will become invisible as if they don’t exist in that layer.
Clipping Mask
Clipping masks are the same as layer masks, except the mask is set on a clipping path instead of a layer. The mask is painted on the path, not the layer itself. This means that you can’t paint on the inside of the path, only the outside. You can use the same method as with layer masking to add a clipping path over a layer. Just brush with the clipping path on the areas you don’t want visible.
Alpha Channel Masking
Alpha channel masking works with the alpha channel, which is an additional channel that Photoshop adds to each layer. The alpha channel is an invisible channel containing information about the layer, such as the layer’s opacity, layer style, etc. With this mask, you can paint over a layer with the mask, but you won’t affect the layer’s opacity.