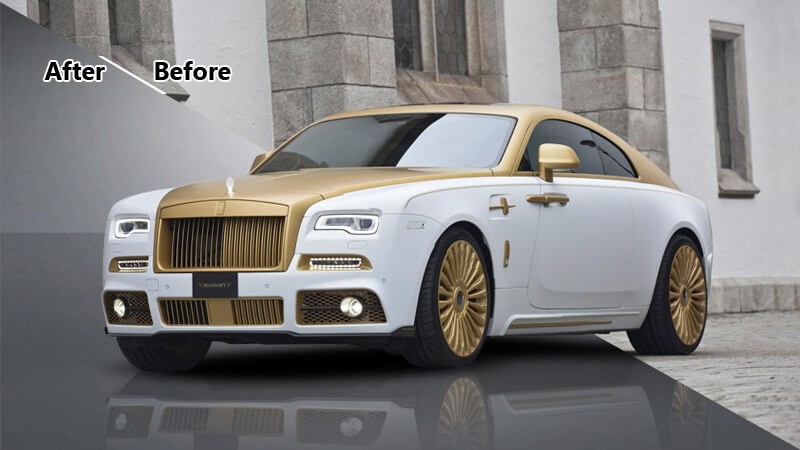
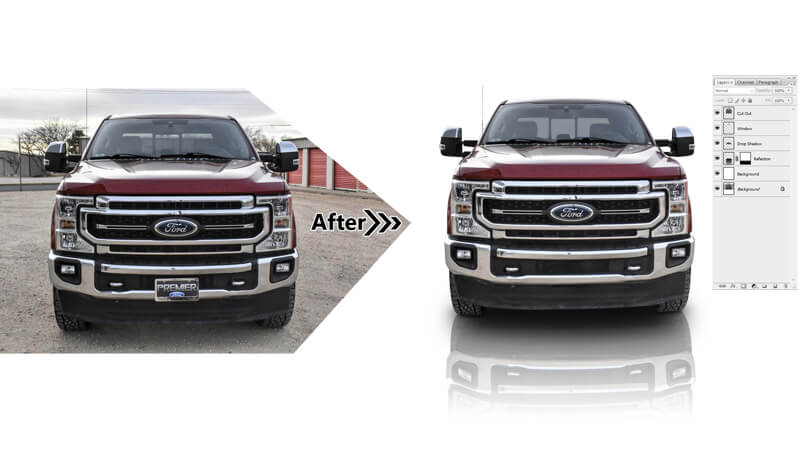
Many people believe that good images in car photography are achieved by the use of complex compositing and techniques. However, you can still get great quality results by working on a single photo in Photoshop. You have possibly heard about different techniques used by pros when they are shooting cars for commercial purposes. Spending a whole day on the set, capturing the cars in varying lights and exposure stacking and also compositing for the addition or removal element on a photo, which normally takes long hours. However, even if you only have one image for your favorite car, you are still in the capacity to make a portfolio piece that will look quite great. In this article, using these steps you can edit car photos in photoshop.

Read More: 10 Secret Tips For Taking Best Car Photography Like A Superstar
You are going to learn some cool techniques you could use to improve your images, or in simple words, widen your skillset. By editing a car from its raw state, you are able to convert them to a digital masterpiece by the use of Adobe Photoshop software.
Editing of car photos is very important for proper showcasing which always makes it more presentable in the case of advertisements and car commercials. The raw file a car photo has is associated with a lot of color and noise imbalances hence they require proper editing.

In this tutorial, we will use Adobe Photoshop software to convert the car photo to become a digital masterpiece. It is important to note that there is no yardstick or direct for the editing of car photos. The nature of the raw file is what determines the kind of editing. The color, lighting and other characteristics
Reduce exposure and increase the clarity of the car photo
In most raw car photos, the clarity of the car is not clear. Light exposure that befalls from the sky and the whole photo is always too much. Before you have proceeded to anything else, you are encouraged to try to sort it out.
Read More: 10 brilliant Photoshop Tutorial For Car Photo Editing
How car photos are edited in Photoshop
STEP 1: You can edit car photos in photoshop. You should ensure that your raw photo of the car is finely placed in your photoshop workspace. Press the filter menu at the top and then navigate on the camera raw filter, or click the shift + command + A on Mac or Shift + Control + A on windows.
On the top part of the camera raw panel, you will see a small rectangular symbol used to reveal the graduated filter name whenever you move the cursor over it. Click the symbol.
A _ sign pops up. This plus sign is used to mark the area you would like to singly edit or work upon.
STEP 2: To deduct the lighting exposure, you adjust the exposure value. You are also supposed to increase the clarity because it eradicates noise exposing all the details the car has. These moves are indicated by the use of red arrows and the camera raw filter panel. It is important to remember that the values of clarity and exposure could be varied because the clarity and exposure of car pictures while editing will depend on the raw file of your picture.
To cover the area occupied by the car photo, drag the plus sign down. At the right part of the panel, new values are going to pop up separately from the previous value for the whole car photo. These new values are solely used for the selected area.
STEP 3: You could adjust the values of the exposure as you desire. Additionally, to have the desired result, the sharpness and contrast can be adjusted too.
When you are absolutely sure that you have achieved the result you anticipated for, to affect and save these changes and go back to the photoshop worksheet, you are supposed to press the ok button.
The results of the location of the graduated filter and these adjustments can easily be viewed on the editing platform.
You are able to darken one area while exposing the other, for a perfect edit. You could also adjust the tint and temperature of selected areas since car photos are not edited for car commercials.
Use of Graduated Filter to Darken the Sky
The exposure of one part of the picture cannot be drastically reduced since it would interfere with the exposure of the car since the car photo and the one part of the picture are present on the same image.
One special sub-filter in the camera raw filter would let us make alterations to the targeted part alone without having to affect the other parts.
Use of the adjustment curve to further edit car photos
You could also use the adjustment curve to consolidate the previous editing you have made. You are supposed to remember that the car adjustment is ideally capable of affecting your whole photo. However, the car area of your photo could be selected out just to make the adjustment to solely affect the car. This selection could be done by the use of various tools. In this case, you use the magnetic lasso tool. It is used for the selection of the car alone.
Edit Car photos in Photoshop
Step 1: Select the magnetic lasso tool from the left side of the toolbar, carefully identify and select the portion of the car you would like to specifically edit car photos in Photoshop. You could choose to edit the front part of the car alone or the lamp, according to the light and color composition the car has.
Step 2: At the top part of the photo interface, hover over the adjustment menu and you will see several options appear. Click on the curve option which has been indicated by a small graph box that has an embedded curve. The curve panel is then going to appear. Adjust this curve consequently till you achieve the desired dodginess and contrast.
From the layer panel, you are going to see a mask of the selected portion of the entire car photo, which in this case, is the car itself that is masked automatically in a different layer after you have adjusted the curve to achieve the result you desire.
Ensure that you have not moved the curve too low or too high since this distorts the car exposure and image spoiling the entire photo editing. The extent to which you make these adjustments are still dependent on the discretion the photographer has or the car photo editor.
There are more tools you could use in the tools panel which are capable of performing similar functions as some of these aforementioned car photo editing techniques. Among those tools are the dodge and burn tools. The burn tool is capable of reducing exposure of a specific part of the car photo you target. Additionally, it brings a burn effect to your photo. You could apply these tools to specific parts where we would like to adjust without having to affect other parts.
Boosting certain prevalent colors available in the car photo
Every photo has some specific colors that bring out the detail the entire car photo has. You can use two different techniques to bring out these details.
In most cases, you are supposed to use the hue and saturation technique. The obvious effect would be compared and noticed to the previous state of your car photo.
How to Edit car image in Photoshop
Step 1: Navigate to the top corner at the right-hand side of the photoshop layout and click the adjustment option. While you might need to use the touch button in some cases, the option might not always be available on the top right corner.
Pick the adjustment option and you will see a pop-up of various symbols that indicate the adjustment techniques such as the curve used in one of the methods you did previously.
Step 2: Pick the hue/saturation alteration techniques which have been indicated by a rectangular symbol partition.
A panel exhibiting the in effect hue/saturation level of the current car photo is supposed to pop up. Hue is the depth of the colors that are present in the car photo. You use the hue option in the edit car photos in Photoshop to alter the dominance of the current colors.
Anytime you adjust the hue to a particular color, anywhere that the color is present becomes more prevailing. It is wise to remember that some of the colors might be available in the car photo but are not obvious to the eye. Hue exposes such colors. Therefore, according to the pleasure of the car photo editor, appropriate adjustment of the hue can possibly be done.
Step 3: It is also possible to adjust the saturation. This encourages the saturation level and spreading of those colors that are present in the car image. Doing further adjustments should only be done when there are no further adjustments you would make.
Final Verdict
Getting your commercial photography clients requires you to be good at the craft. With the availability of sources of information such as social media, you could learn how to do all the necessary edits at no cost.
