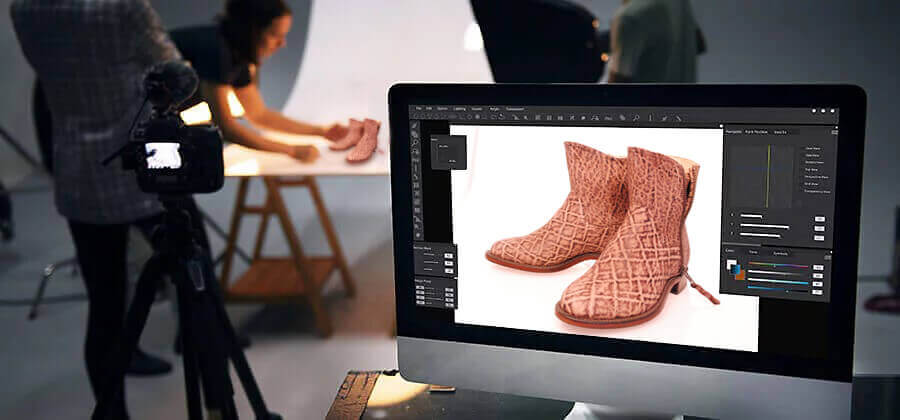
Step 1: Import Photo to Editing Program

DSLR or Mirrorless cameras today can capture photographs in RAW format. So, there is nothing to mention separately of this mandatory part. You need to use a professional photo editing program like Photoshop and import photos. Further operations come by steps after as this only the gateway to photo modification.
Step 2: Go Through Camera RAW Filter

Any RAW Photo you used to open in a photo editing program like Photoshop goes through Camera RAW Filter. Well, you can use this option for any photograph even that is not a RAW format. But, that does not do the same.
In fact, that is a filter you can use if you need some modifications before editing. Digital cameras also have their own RAW format management program that comes with the device.
Step 3: Lens Corrections Really Helps

Lens corrections come right after the Camera RAW process just before starting photo editing. The step is more important in the case of using wide-angle lenses during photography.
However, lens correction is useful even you are with regular lenses. You can do chromatic aberration correction if you find an irrelevant tint at the edges of the subject or the whole image.
Step 4: Crop Your Photo

Cropping Photo is the stage where you enter into photo editing operations. All the edges or areas may not be significant with photo presentation at full length. You need to cut off some areas around the edges by cropping photos.
You can do it later if you think of it as more fruitful than the beginning. Cropping the photo will not delete the edge, just hide it. So, you can reveal them later if you need to.
Step 5: Balance Horizontal View

All the photographs may not come out with a perfect horizontal view. So, it is important to make the view straight rather than bowed down or with the wrong skew. You can correct them with the help of the Transform Tool of Photoshop. Make sure to balance the horizontal view for the best look.
Step 6: Retouch Visible Impurities

Retouching is the polishing operation of photo editing services. We remove spots, impurities, and any other imperfections visible in photographs with this. But, wait, this is not a tool that you can use for impurities corrections. In fact, this is an operation and you need to do it manually for the best and perfect result.
Step 7: Exposure Correction Is Must

Photo Exposure is one important part of product photo editing that you cannot ignore. You may have a photograph with a dim or dull effect which is not acceptable. So, take care of the exposure for sure to make a photograph visually focusing. Just do not overdo it as it may create a negative impact on the audience.
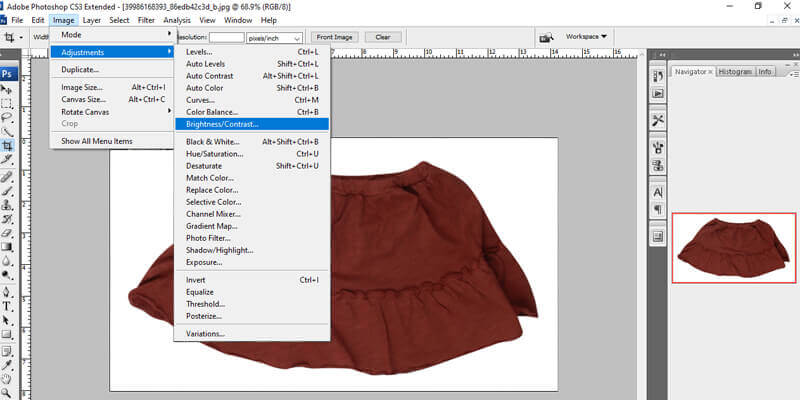
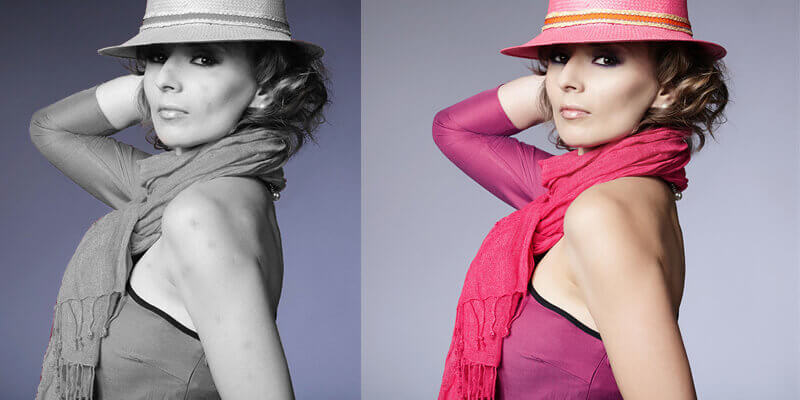
Step 8: Color Correction On Demand

Right after the Exposure Correction, Color Correction is the matter you should have a look at. The color or tone of photographs may not be always perfect. So, you need to perfect them with the help of photo editing software like Photoshop.
Use the Hue/Saturation adjustment layer and tune a bit. Also, you can add effects if you need them as a finishing touch.
Step 9: Adjust White Balance

White balancing is also important for a proper look of products. Increasing the white may cause over-brightness and that will be odd looking. Similarly, lowering white can cause dark shades over the photographs. So, you need to make a balance of brightness to get the perfectly looking brightness level.
Step 10: Noise Reduction for Smoothness

Noise is a common property of any product image if that is not well polished or shiny. Professional cameras are capable of capturing every detail and even the noise. But, products for eCommerce markets should be noise-free most of the time.
Also, you may see unexpected noise during product photography or changing colors by photo editing. And, that should be taken care of.
Step 11: Sharpness Tuning

The sharpness of the product image is an unavoidable property that you need to focus on well. If you have a look at the products on the eCommerce websites, you will find all of them sharp enough.
And, that is because, without the proper sharpness, a product cannot get the appeal. So, you know what to do. Make your product sharp for the best view.
Step 12: Contrast Correction
The Contrast is another property of a perfect product image for the online market. Do some adjustments with the contrast level to make the photos that catch customers’ eyes.
Here also, you need to do it under limit like brightness adjustments. Otherwise, you may harm the smoothing view of the product image as a result.
Step 13: Have A Look At Histogram
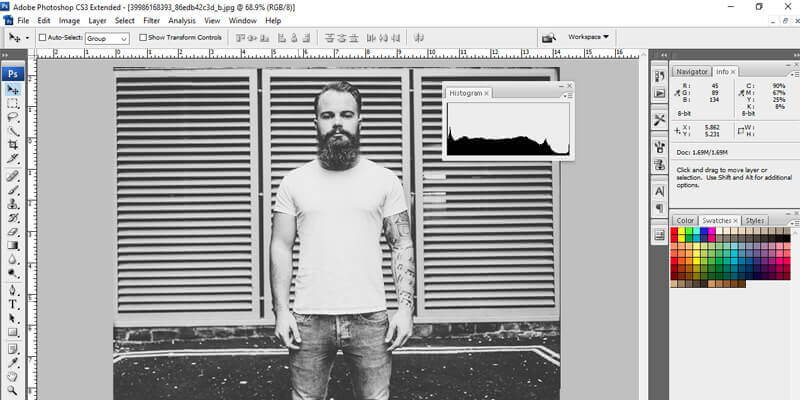
If you think of taking care of all the corrections you may need to do for product images you should not miss the Histogram. The histogram is a level adjustment layer where you can modify the strength and tones of colors.
Though it works over colors it is independent of the color correction for the characteristics. Do some adjustments to bring the best strength of colors.
Step 14: Add Effect If Required
Add some effects if you think of doing it useful for your product images. Well, this is an additional option that you may like to use or may not. However, the addition of effects can reduce your labor if you have the proper knowledge.
However, most of the product photos do not need the effect to add over it. But, it may be appealing sometimes if you can do it properly with the correct adjustments.
Step 15: Export
After doing all the modifications mentioned above, it is time to export the photos to your required format. Most of the time we save the photo as JPEG because of the support. Well, there are other formats that you can use according to your need.
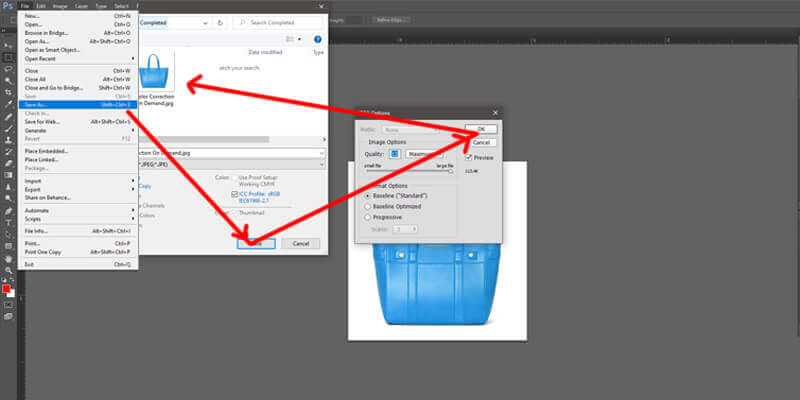
You can also save the photos for the web format with size specifications. So, you can have the image weight as you need. But, make sure to save a copy in editable formats like TIFF or PSD. And, you can make changes later on them if necessary.
Usefulness of Product Image Editing
The fundamentals of the product photo editing checklist are to create a list of things you should check on. We have mentioned all the essential parts that you are going to need for a perfect product presentation. Well, some things we could not explain in detail for the sake of word limitation.
But, you can follow our services and blogs to learn more about Product Photo Editing Services. The usefulness of the checklist is not to miss any part that is mandatory. With the proper following, you can make the best presentations of your product photographs without any doubt.
Some points are conditional as all the products do not need the same type of presentation. But, if you use them as well under the balanced adjustments, the result will be positive. The rest is up to your understanding and level of expertise.
Conclusion
The mentioned checklist can give you knowledge of the things you should do. Our intention is to make a brief of the whole thing. Perfection of the tasks highly depends on the efficiency level that you need to achieve.
Doing the modifications might look tough or hard to understand. But, trust me, they are as simple as having a meal. So, follow them well and try by yourself for better understanding. You can get help from professionals if you think it worthy.
Or, you do the product photo editing by someone who is an expert in this. But, that is an option only. You can do it by yourself and the results will come out with satisfaction all the way if you can do it well.