Car Photography: How to Set Up Lighting For Automotive Photography

car photo editing service provider

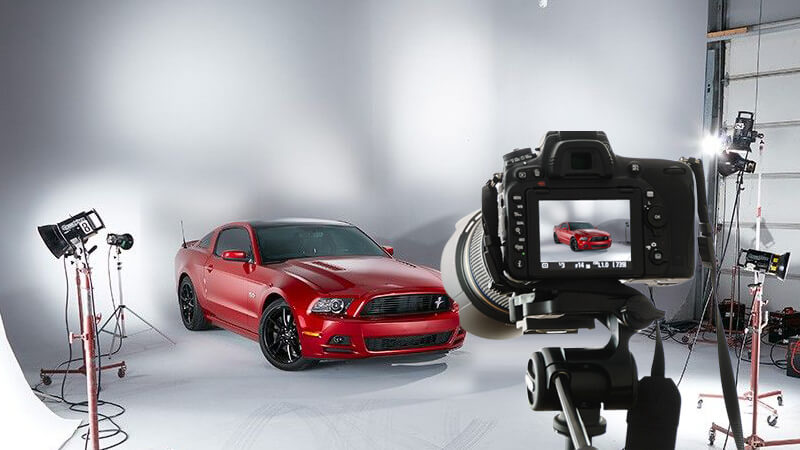
Have you ever wondered how to make the best possible picture of your car? The first thing you have to do is get the right equipment. You will need high-quality photography lights and plenty of time to light up your car from all angles.

lighting for car photography

Once that is done, it’s time to experiment with different settings and techniques until you find the perfect one. Read on for several tips on how to set up lighting for automotive photography so that you can take the best possible photo of your car:

Set Up Lighting For Automotive Photography

Car Photography: Use a Tripod

A tripod is an excellent investment for any photographer. It will make it easier to take pictures as you can set the camera on a fixed object and walk around it. This is especially helpful when taking pictures of cars as they are usually quite big.

If you don’t have a tripod, try using a wall or some other structure to fix your camera so that the vehicle doesn’t move while you are taking pictures.

Determine The Best Time of Day

The first thing you should do is determine the best time of day for your car photography. Generally, you will want to shoot during the daytime hours between the morning and early afternoon. This is because it is usually the brightest time of day, and there is a lot of natural light to work with. Plus, there were fewer shadows created by trees and buildings during this period.

But if you are shooting on a cloudy day or at night, you may need to use artificial light sources like an LED light panel instead.

Focus on the Chassis of the Car

When photographing a car, try to focus on the car’s chassis. The chassis is where all of the important details are. A photo of the entire car can be good at times, but it’s best to take close-up photos when you can.

Make Sure Your Background is Clear.

The background is just as important as the car itself. The goal of automotive photography is to show off the car and not let anything else take away from it. The best way to get a perfect background for your photo is by using a white sheet or something of that sort.

Experiment With White Balance and Shutter Speed

One of the easiest ways to change the mood of a photo is by changing the lighting. Experiment with different white balance settings until you find one that suits your subject best. Auto mode is great for beginners and automatically adjust shutter speed, aperture, and white balance to suit the available light. If you want more control over your picture, try adjusting these manually.

As well as changing the mood of the photo, experiment with different shutter speeds and apertures to get the perfect shot. A slower shutter speed captures motion while a higher shutter speed freezes it. If you want that sharp detail car images are known for, use a high aperture setting and take your time lining up your shot to avoid camera shake!

Beware of Water Spots

Water sports are among the most common issues that plague car owners who want to share their car with the world. Even though water spots seem innocent enough, they can be a pain for many people. They can make a car look dirty and grimy, which is the last thing a proud car owner wants to see.

So how do you avoid them? Try spraying your vehicle’s surface with some water before taking the photo. Doing so will ensure that any dust particles on the surface of your vehicle will be moistened and, therefore, less likely to stick to or leave a mark on your car’s surface.

Don’t Forget About Reflections

Reflections are a common issue when it comes to automotive photography. Reflections can be a bit of a pain, but the best thing you can do is place your lights strategically so that they don’t cause any light reflections on your car.

Play With Light Sources

When setting up your lighting, the most important thing is to find the best possible light source. The type of light source you choose will depend on the environment you are photographing it. For example, if there is a lot of sunlight, use natural light and reflectors to create softer shadows.

If you’re in an enclosed space with low light or using artificial light like LED lamps, make sure that the lights are evenly spread throughout the room so that the shadows aren’t too heavy and dark. Experiment and see what works best for your car.

Add Some More Lighting Around the Car

car photography lighting

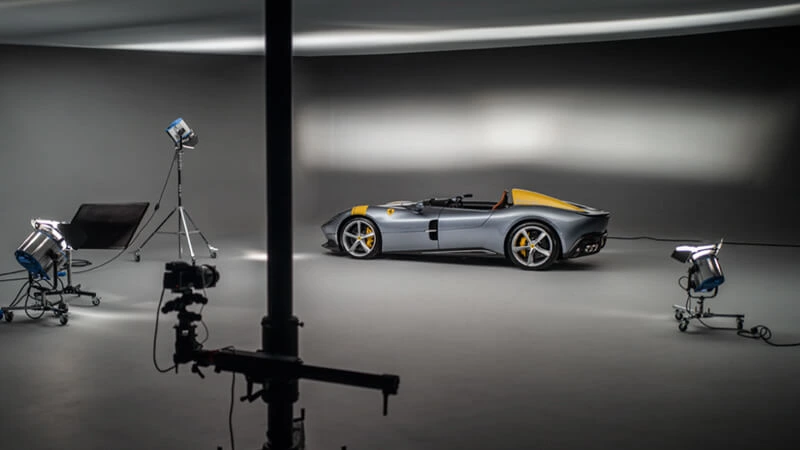
Setting up at least 2-3 lights around the car is imperative. This will allow you to have a complete picture of the car and not just a static-looking photo that shows one angle of your car. Ideally, you should place two on either side of the car and one in front, but this isn’t always possible. If you can’t place a light behind the car, place it as close as possible for maximum effect.

Create a moody feel by using directional light only in one part of the car (point)

Point lighting is the traditional way to photograph cars with a studio setup. The point light is typically used for outdoor photography. Point lights can be used for automotive photography so that you can create a moody feel by using directional light only in one part of the car, like shining it from the front or under the front bumper.

Automotive Lighting Photography to get the right equipment

First of all, you will need high-quality photography lights. Make sure they are daylight and not tungsten, as the light from tungsten will create too much heat, which would distort the car’s features. You will also need plenty of time to light up your car from all angles if you want to take the best possible picture.

See-through fabric, like a white cotton sheet, is ideal

You will need to set up your lights and find the perfect spot to photograph your car. You can use see-through fabric as a backdrop, like a white cotton sheet. Ensure that there are no wrinkles in the fabric, or else you will have to iron it. You can also just leave the back of your car hanging over a chair or something similar if you don’t want to set up anything elaborate.

Take a picture from underneath.

The best photographic light is natural light. If you can take your picture outside during the day, do it. If not, turn on all the lights in your garage to create a lot of light and take your photo from underneath. This will cast an even glow on your car.

Find a good location for Automotive Photography

The first step to taking the perfect car photo is finding a good location. The best way to do this is to find an area of your garage or driveway with plenty of space, smooth surfaces, and good overhead light. This will ensure that you can get the right light and angle on your car without worrying about the clutter in the background.

Lighting for Car Photography: Turn off the lights

The first step is to turn off all the lights in the room. This includes overhead lamps, any window light, and fluorescent lighting. You will need an entire darkroom to achieve the best possible photo.

Lighting for Automotive Photography: Use Natural Light

One of the key factors in taking a great car photo is using natural light. This will ensure that you don’t have to spend a lot of time editing, and you can get the perfect shot straight out of the camera. If you are taking your photos inside, try to take them in front of a big window where the lighting is soft and indirect. If you are outside, find a spot with good quality and direction from the sun.

Create a Balance of Light and Shadow

It’s recommendable that you balance the amount of light and shadow in your photo. Having a bright area next to a darker area will make for an interesting composition. You can create this by using one light source from the front, one from the back, or two lights of different brightness.

Experiment with Effects

Experimenting with different effects is an excellent way to make your car stand out. Start by taking a picture of the car in pure white light and see how it looks. Then try the same picture with a blue filter or yellow filter. You don’t need any fancy equipment for this experiment; just take pictures of the car in different lights, and you will be able to see which effect looks best on your car.

Shoot from All Angles

Photographing your car from all angles is the best way to find the perfect angle. You might have to move the car a few feet and try out different lighting setups until you find the right one, and that’s okay.

Conclusion

Now that you know how to set up the lighting for your automotive photography, it’s time to get to work. Stand in front of your car and take a few test shots before turning your camera on. Review the pictures and make any adjustments to the lights or fabric needed to create the effect you want. Once everything is set up, snap your shots and get ready to show off your work.

Welcome to Image Clipping Path India. To check our quality send 2/3 images for a Free Trial.

X
× How can I help you?