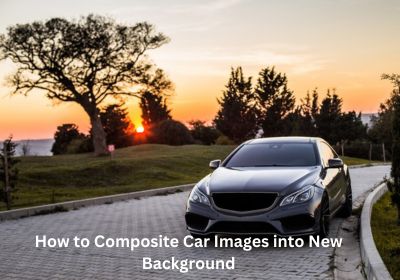
Car background is a major part of enhancing your car’s overall outlook. So, composite car images into new background are a must to satisfy your website visitors and your mind. Surely, an unfit image background will make your masterpieces more distracting. However, the composite car images into new background techniques will be a great support to improve your issues properly. So, to make an eye-catching look, you have to apply the technique that you have to follow for changing the background of your car images. So, an attractive background can improve your car’s beauty. The highest benefit will be that, your clients will be attracted with the amazing background. Let’s know the details of the effective terms-
Short Overview of Composite Car Images into New Background
Car background composition is one of the more advanced photo-improving tasks to enhance image attractiveness within a very short time. You will get the most effective car-improving tools to change your improper background from the selected images. Moreover, the most functional image background-improving techniques are-
- Car clipping path
- Car photo retouching
Basically, a car clipping path will make your image background more transparent and you can replace your unfit background with the appropriate one. This will make a completely fantastic image with full requirements.On the other hand, photo retouching is an editing service that is involved with multiple essential tasks. The most useful and common editing services are cleaning blurring, adjustment of color, dust removal, adjustment of glass reflection, etc. Besides all of these, you will get amazing performances within your car background removing services to improve your professional images.
Importance of Composite Car Images into a New Background
By applying different types of photo editing tools and applications, you will find out some issues related to photos. So, it will be more challenging for all to get a perfect photo from your single capture. Several essential benefits that you will get from the composite car image improvement are-
- You can make your image professional by removing dust.
- Removing unnecessary shadows and reflections will make your images professional enough.
- A proper filtration system of these exclusive editing techniques will bring a perfect match to your images with an appropriate background.
- The attractive appearance of your images will be enhanced with a circular polarizing filter.
- Finally, image post-processing is an advancing technique that will help to make your photos perfect for multiple purposes.
Step-by-step techniques to Composite Car Images into a New Background
seamlessly to create a realistic and cohesive final result. Here’s a step-by-step tutorial using Adobe Photoshop, one of the most popular tools for image compositing:
Step 1: Gather Your Resources
- Download high-quality images of the car you want to composite and the new background you wish to use.
Step 2: Open Images in Photoshop
- Launch Adobe Photoshop.
- Open the image of the car and the new background.
Step 3: Select and Extract the Car
Select Car: Use the Pen Tool (P), Magnetic Lasso Tool (L), or Quick Selection Tool (W) to carefully select the car in the image. Make sure to include all details like reflections, shadows, and fine edges.
Refine Edge (Optional): Use the Refine Edge tool to fine-tune your selection, especially if the car has intricate details like hairline reflections or soft edges.
Extract Car: Once the car is selected, copy it (Ctrl+C) and paste it (Ctrl+V) into a new layer.
Step 4: Remove the Background
- In the new layer containing the car, use the Eraser Tool (E) or Layer Mask to remove the original background. This will leave only the car on a transparent background.
Step 5: Place Car on New Background
- Drag and drop the car layer onto the new background image. Adjust the size and position as needed.
Step 6: Adjust Lighting and Colors
Match Colors: Use Adjustment Layers (e.g., Hue/Saturation, Color Balance) to match the colors of the car to the new background.
Shadows and Highlights: If necessary, create a new layer and use soft brushes with low opacity to paint shadows and highlights to make the car blend more naturally into the scene.
Step 7: Refine Edges
- Zoom in and carefully check the edges of the car. Use a soft brush or layer mask to refine any rough or unnatural edges.
Step 8: Add Realistic Shadows
- Create a new layer beneath the car layer and use a soft brush to paint realistic shadows based on the direction and intensity of the light in the new background.
Step 9: Final Adjustments
- Make any final adjustments to lighting, colors, and overall composition.
Step 10: Save and Export
- Save your composite image in a suitable format (e.g., JPEG, PNG) and resolution.
Tips to Take a Perfect Photo for Compositing Car Images into Background
You have to follow some essential steps through which you can make your car photos more professional with a perfect background. Let’s know the processes and gain knowledge about the editing steps sequentially-
- Finding the exact position of the car image.
- Focus on the car angle.
- Separate the exact car from other terms.
- Choose the background that you prefer
- Place your car only into the new background
- Adjust and balance all perspectives of the car
- Adjusting all perspectives of the car background
- Making car shadows to make it more realistic.
- Cleaning the reflective surfaces from the background
- Finally, check out all the changes and be happy!
Conclusion
Photoshop requires the most effective creative touch to composite car images into new background. You have to invest effort in the improper background transformation. It is a must to pay attention to the instructions to make your car image more realistic. The best and most attractive feature is a flawless background that can remove all distractions and highlight the automobiles. Millions of automobile images can help you build your brand value with these simple and effective steps.
